Disclosure: This blog contains affiliate links. This means that if you click on a link, I may earn a commission if you make a purchase via that link, at no additional cost to you. Thanks for your support! :)
When I was first teaching myself to work with fondant, I found one of the hardest parts was actually covering the cake and having it look smooth. I struggled with pleats around the bottom, cracking and tearing fondant and corn starch or powdered sugar spots all over the fondant.
I looked at pictures and instructions, watched youtube videos and read forums. While there is a lot of good information out there, I felt like there was a lack of good suggestion all in once place or the videos went by so quickly. I watched adept hands make quick work of covering a cake with no issues and I struggled to figure out what they were doing.
I'm going to take you through my biggest tips and pointers for getting a nice finish so you can learn to cover your cake without pleating, tearing, holes, or any other frustrating issues that have you beating your head against the counter. This is good for those new to fondant as well, however, I will say that watching videos does help immensely so combine my information with some other videos and information out there.
Tip 1: Start with the right fondant
I originally used marshmallow fondant. While it's easy to make and I've seen other people achieve professional-looking results with it, I found it sticky and hard to work with and I had issues getting it the right consistency. I started making fondant from scratch and the best recipe and the one I use all the time is Michele Foster's Fondant recipe. A half batch (what I usually make) will cover up to one 10-inch round and it's actually not all that hard to make.
One thing I found that really helped me was to buy a package of pre-made, high quality fondant to see what the consistency was like. That way I could better achieve the correct consistency when making it at home. I bought a container of Satin Ice, but I've heard good things about FondeX. Just avoid the Wilton stuff, okay? (Ick!)
Tip 2: Get your icing as smooth as possible
The icing on your cake (under the fondant) should be as smooth and hard as possible. For this reason, many people really like working with ganache under fondant. You can get it as smooth as glass and it sets up as hard as a rock. I like ganache, but it's really rich and expensive so I mostly work with meringue buttercreams under my fondant which also provide a nice smooth surface. I use metal bench scraper and an icing spatula to get my buttercream smooth before I apply my fondant.

Tip 3: Knead your fondant in pieces
I divide my fondant into several pieces to knead it. Then I zap each piece in the microwave for two 5-second increments to soften it slighty (no more than 5 seconds per zap or you'll melt it!) and then I work it on the counter. I keep the other chunks wrapped in plastic wrap so that they don't get dry and crusty while I work.

While I'm kneading each section, I add a dollop of shortening and a dollop of glycerine to soften the fondant and make it smoother and more pliable. The shortening also helps the fondant to be less sticky. That way, you can use less corn starch (or powdered sugar) when you're rolling. Corn starch and powdered sugar leave white stuff everywhere and can dry out your fondant.

Once you've gotten all the chunks kneaded individually, put them together and knead the fondant until it's warm, soft, smooth and pliable. Remember silly putty? It should be a lot like that in consistency.

Tip 4: Put away the spray bottle
I had always read that you should spray the cake with water (after frosting) before putting the fondant on. This never worked properly for me. The coverage was always uneven, with some spots too wet and some too dry, and the fondant was always slipping around and gooey. What a mess!
Then I watched someone apply piping gel with a pastry brush on youtube. Ding! I don't generally have piping gel on hand, but the pastry brush works perfectly. I generally use water with a small amount of tylose powder dissolved in it (which is what I use to adhere pieces of fondant or gumpaste together when making my figures or applying them to the cake). But water works, too. The coverage is nice and even and you can apply it pretty thinly. It also helps do some final smoothing on your cake. Win!

Tip 5: Use your corn starch or powered sugar sparingly
Less is more. My preferred anti-stick is corn starch. Really, you don't need much corn starch to keep the fondant from sticking to your counter and rolling pin. I dust just a slight amount on my slightly flattened disc of fondant, rub it around, flip and do the same on the other side. Then I sprinkle a small amount around the countertop where I'll be rolling.

As I roll, I put my hands under and all around the edges to make sure it isn't sticking to the counter. If need be, I sprinkle just a bit underneath and rotate the fondant slightly to distribute.

Tip 6: Roll it out bigger than you think it needs to be
Measure your cake across the top and sides. Got that added up? Great, add another 2 inches to the dimension. So if you measured 10 inches across the top and your cake is 3 inches tall, that's 16 inches of cake total. Roll out the fondant to at least 18 inches. I actually like a little more. More fondant along the bottom means you have more to work with when it comes to lifting and smoothing around the bottom and less opportunity for pleating and folding along the bottom.
Tip 7: Roll it up
When you're ready to put it onto the cake, roll the whole thing back onto your rolling pin. Don't try to lift it with your arms or your hands and put it onto the cake. You'll get more air bubbles if you try to do it like that. The rolling pin method allows you to roll it slowly over the top of the cake.

Tip 8: Secure the top edges first
Once you've rolled it onto the cake, secure all around the very top first. This will prevent the weight of the fondant from pulling away from the edge and tearing your fondant. The other thing that helps prevent fondant from tearing and breaking is the glycerine and shortening you added when you kneaded the fondant earlier as well as using a scant amount of corn starch (or powdered sugar).

Tip 9: Lift up and in
Now you're going to work your way down from the top, smoothing out the fondant. Work your way around the cake, smoothing a half inch to an inch at a time all the way around, then keep going around until you get to the bottom. Sounds easy, no? This is the moment of truth. The trick? As you smooth with one hand, use your other hand to lift up the excess fondant on the bottom and push in towards the cake just slightly. It sounds completely counterintuitive, but just try it. Up and in. All that excess will help you with this. Keep lifting as you smooth down.

Tip 10: Cut, smooth, cut
Once you've smoothed it all out with your hands all the way around, cut off all the excess with a pizza or pastry cutter.

Then use a fondant smoother to smooth it all down. Push in and move it up and down all around the cake. You'll end up with a little bit more along the bottom edge. Use your cutting wheel to cut it again as close as you can to the bottom edge.


Tip 11: Use a butter knife to get a clean edge
Are you always putting something around the bottom of your cake to hide that ragged edge? I take a butter knife and work my way around, using it to gently remove and/or tuck in any excess underneath and create a nice smooth edge.

If there's still a lot you didn't get, use the pizza cutter again. If it's just a tiny bit stuck to the cake board, you can scrape it off the cake board with the butter knife. If there's some that is uneven, use the butter knife to press it gently up into the cake.

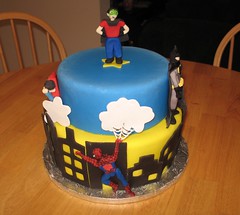
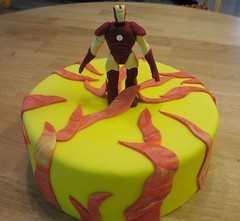
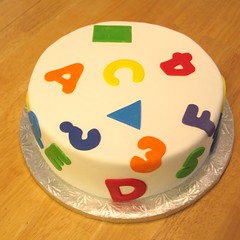
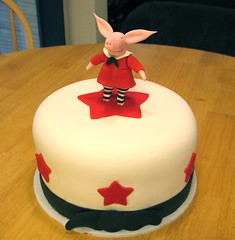
That's it! Now you have a smooth cake with no folds or pleats and a nice clean edge along the bottom. Now you don't have to worry about positioning your decorations to cover up your mistakes!
UPDATE Jan 3, 2015- Thanks so much to everyone for your comments and questions. I had no idea so many people would find this so helpful when I published it a little over four years ago! :) Here are answers to some frequently asked questions from the comments:
Q. I don't have any glycerine and can't find it! Where do you buy it? (And can I use something else like extra shortening instead?)
A. I'm not aware of anything that provides the smoothness and elasticity of glycerine. You do need to make sure you are purchasing food-grade glycerine (it's commonly used in cosmetics and there are non food-grade versions available). I buy mine locally at Whole Foods Market. It is the Now Foods brand in a 16 oz bottle and it's in the health and personal care aisle (near the shampoos and stuff, but don't worry, it's food-grade). It's available on Amazon.com here. You can also buy it online at various health and vitamin type shops and also at places like Drugstore.com and Soap.com.
Q. What is shortening?
A. Shortening is a kind of fat that is solid at room temperature. It's basically oil that is solid. Some people call it "Crisco" which is a popular brand name in the US. I prefer to use Spectrum brand organic shortening which I buy at Whole Foods. Crisco will work, though.
Q. What can I use to brush on the cake to adhere the fondant? I saw you mention piping gel but I don't have that.
A. I don't use piping gel either so don't worry! If you do happen to want some, you can buy it at most craft stores like Jo-Ann, Michaels, or Hobby Lobby. But it's not necessary at all. You can use a little water on your pastry brush or you can use water with a bit of tylose powder dissolved in. Tylose is great to have around as a cake maker anyway because you can mix it with fondant when you make fondant figures so that they will harden.
Q. What kind of fondant do you use?
A. I make my own. I like this recipe.
Q. Do you cover your cake at room temperature or chilled?
A. Definitely chilled. You want that buttercream (or ganache) as hard as possible. Chill it for at least an hour.
Q. Do I have to put icing under my fondant?
A. Yes. Icing is not optional.
Q. Meringue buttercream sounds intriguing. Do you have a recipe?
A. As a matter of fact, I do! Right here.
Q. How thick should the fondant be when it's rolled out?
A. I roll it out between 1/8-1/4" thick.
Q. How can I get sharp squared-off edges on my cake?
A. There are a couple of methods to get that crisp squared-off edge. Personally, I put the whole cake into the fridge for a bit to get the fondant to start to firm up. Then I go all around the cake and sort of pinch it between my fingers. I've also watched a youtube video of a lady that used two fondant smoothers to sort of smoosh them against each other towards the edge. Finally, there are some people that actually flip the cake over onto it's top and smooth downward, then let it set in the fridge and chill and then flip it back over. But really, the first, pinching method is my go-to if I want that nice squared off look. Here's an example of one that I used the pinching and you can see it just looks nice and squared-off. You can't tell it was pinched!